
Why I tried Propagating Cordyline in Southwest Florida
This past summer into winter 2025, my wife and I were renting a small home in Southwest Florida (Naples, to be specific). We had recently moved from Central Texas (Zone 9a) to Southwest Florida (Zone 10b) and were waiting for our new home to be completed in neighboring Bonita Springs.
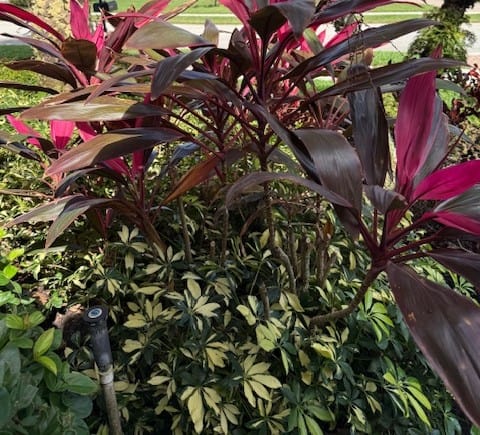
I couldn’t do any landscaping at our new house under construction unless I wanted it destroyed by workers and heavy equipment. Knowing my desire to grow something wouldn’t be satisfied just sitting around, I decided to experiment with propagating some of the plants around our rental home — specifically Cordyline.
And hey… maybe it would save me a few bucks on landscaping later. (Answer below.)
Some links on this page may be affiliate links. If you purchase through these links, I may earn a small commission at no additional cost to you. This helps us continue to bring you content.
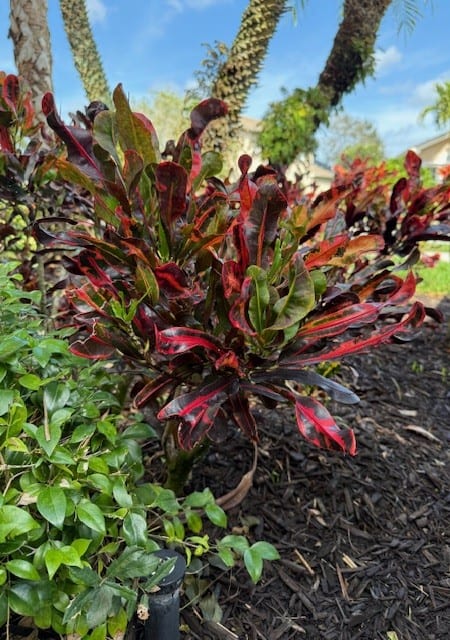
I chose Cordyline because it was readily available and a quick search suggested it was fairly simple to propagate from cuttings. I also tried propagating a few other plants around the yard, including Crotons and Schefflera ‘Trinette.’ Spoiler alert: the Crotons and Schefflera didn’t do well for me.
Cordyline, however, proved to be much more forgiving.
Note: While this experiment was done in Southwest Florida (Zone 10b), the same approach should work in any hot, high-sun climate with sandy or fast-draining soil.
Step-by-Step: How I Propagated My Cordyline Cuttings
I already had a few supplies on-hand, such as some sharp bypass pruning shear, but I knew I needed a few must-have supplies to get this done cheap and easy. Note: It is important to have pruning shears designed to cut plants, as scissors or anything not sharp will leave a poor cut and inhibit the roots from forming well (i.e., it’ll waste your time and money).
With that, I set off to get these items…
Containers
I picked up a few two-gallon plastic nursery containers, which ended up being a good size. Anything smaller will become root bound too quickly and require more frequent watering.
One-gallon pots would be the absolute minimum I’d recommend, but they’ll need to be repotted sooner and monitored more closely for moisture.
Personally, I prefer square pots because they fit together more efficiently — but that’s just preference.
Soil Mix (Hot Climate Version)
Your soil mix will depend somewhat on your local conditions. In Southwest Florida (Zone 10b), most native soil is extremely sandy — think beach sand. That was a big adjustment for me coming from limestone-heavy soil outside of Austin, Texas.
For propagating Cordyline in hot climates, I used:
- 1 part mini pine bark nuggets
- 1 part sand (native sandy soil works fine)
- 1 part potting soil (to add organic material)
Note: You can get also get the pine bark nuggets at your local big box store in bigger bags.
This mix drains well but still retains enough moisture to support root development in extreme heat.
Rooting Hormone
I used CloneX liquid rooting hormone purchased from Amazon. It was easy to apply, though it can be messy — it’s a thick, purple liquid that stains. I recommend protecting whatever surface you’re working on.
One thing I learned: do not store rooting hormone in a hot garage. Heat will degrade it over time.
I haven’t tried powder-based hormones yet, but I suspect they would work similarly.
Taking the Cuttings
To take the cuttings, I selected healthy Cordyline stalks from donor plants in my yard and cut 6–10 inch sections using sharp pruning shears. Each cutting included at least one visible node (the small bump or ring where leaves attach), since that’s where new roots will form.
I removed the lower leaves to expose the stem, then used my pruning shears to lightly scrape the stem near the base. I wasn’t gouging it — just gently exposing a bit more of the inner tissue to encourage rooting.
Next, I dipped the cut end into rooting hormone, making sure to coat the scraped area as well. That entire treated section was then planted directly into my prepared soil mix.
I didn’t overthink angles or fancy techniques — just a clean cut, a healthy stem section, and into the soil it went.
What to Expect Week by Week
Weeks 1 to 3
I won’t lie — your plants may look terrible at first.
Some may look completely dead. Leaves may droop or discolor.
Keep the soil moist but not saturated. In Florida, if it rains, don’t water. If it doesn’t rain, you can skip a day, but don’t go more than 1 to 2 days without checking moisture levels.
Watch for pests. I had issues with squirrels and other critters disturbing my planters. A few cuttings were completely uprooted overnight.
Weeks 4 to 6
Around this time, you’ll start seeing signs of growth.
Some cuttings may fail — that’s normal. If you achieve an 80–90% success rate, I’d call that a win.
If some die, just take new cuttings. They’ll simply be a few weeks behind.
Make sure plants get adequate sun and consistent watering during this phase. Roots are actively developing, and in extreme heat, containers dry quickly.
Do not fertilize yet. The potting soil provides enough nutrients during early root development.
If using a 2-gallon pot, do not transplant yet. Let the roots establish more fully.
If you used a 1-gallon container, transplanting around 6 weeks may be reasonable.
Weeks 7 to 10 (shown on left below)
By this stage, the plants are ready for transplant.
Root systems should be well developed, and top growth will begin accelerating.
If you’re planning to install them in the ground, this is a good window.
In the picture below, the Cordyline plants on the left are in the 7 to 10 week range.
These are noticeably smaller than the bigger ones on the right, which were started earlier and are 12+ weeks in the picture.
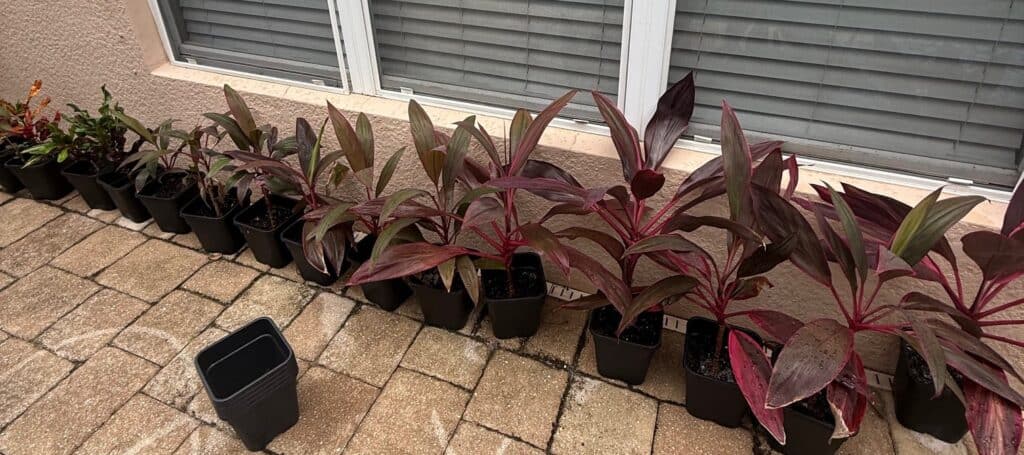
Weeks 12+ (shown on right above)
In the above picture, the Cordyline plants on the right are the 12+ week range. You can see how large they are due to the extensive root development between 7 weeks and 12+.
At 12+ weeks, the plants will have significantly more root mass and top growth.
I do not recommend leaving them in 2-gallon containers much longer than this. They’ll become root bound and begin to suffer without additional nutrients and space.
If you must keep them longer, move them into 3-gallon or 5-gallon containers.
On a budget? A 5-gallon bucket from a big box store with drainage holes drilled works just fine.
What Happens If You Wait Too Long?
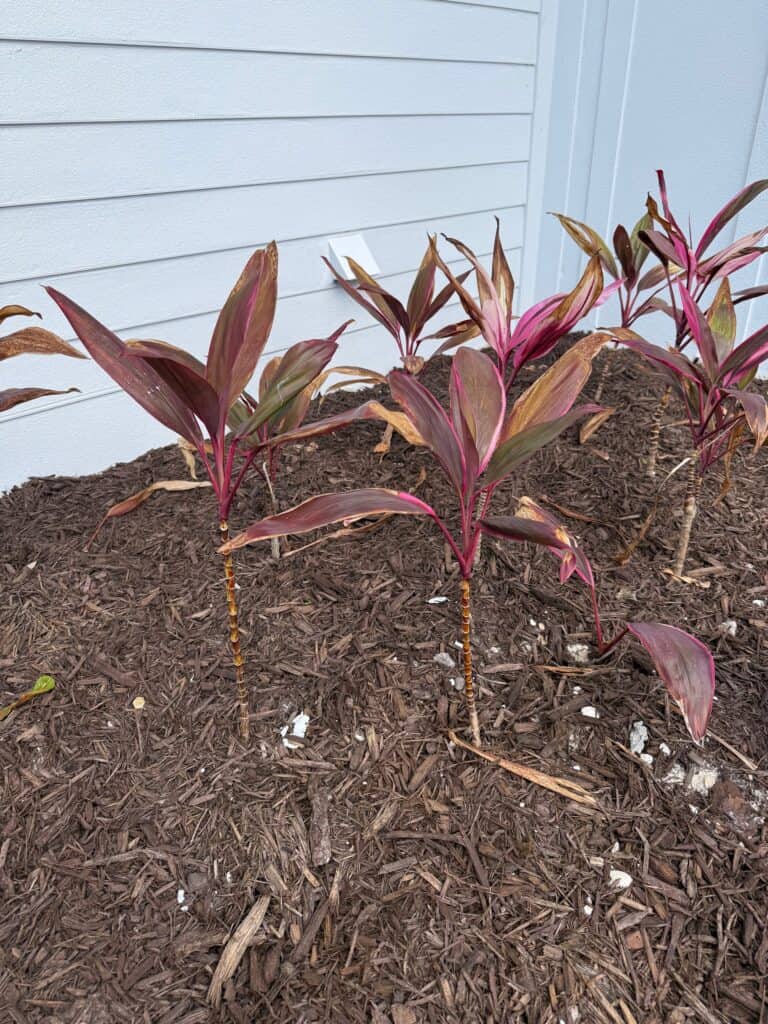
Unfortunately, I waited nearly 20 weeks before planting mine because my new home wasn’t ready.
The plants became spindly and lost some of their lush growth.
However, Cordyline are resilient plants. Cutting them back in mid-spring encourages lower, bushier regrowth.
A light application of basic fertilizer (nothing fancy — even standard Miracle-Gro basic all-purpose plant fertilizer works) helps restore vigor.
Was It Worth It? Cost Breakdown
Yes. Absolutely.
And I’ve already started Round 2.
Let’s break down the numbers:
Retail estimate:
15 plants × $16 each (conservative Home Depot estimate) = $240+
My total cost:
Approximately $50 (containers, soil materials, rooting hormone)
Savings:
Roughly $190+, plus reusable containers.
If I had planted them right at 12 weeks when they were healthiest, the results would have been even better.
Lesson learned.
Final Thoughts
If you live in a hot, high-sun climate like Southwest Florida, Cordyline propagation from cuttings is completely doable — even for a first-timer.
Next round, I’ll transplant at the 12-week mark, mulch properly, and fertilize earlier in the growing season.
Stay tuned for Round 2.